UTEE Tins with Micro Bead Accents

By Evelyn Spikes
Supply List:
- Painted Tin
- Heat gun
- Embossing Powder—regular or ultra thick embossing enamel (UTEE)
- Embossing inkpad (Versamark)
- Deeply carved rubber stamp
- O'So Sticky Tape to fit both the bottom half of the tin and the rim of the lid
- Micro Beads

Directions:
Introduction:
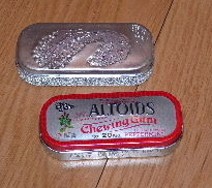
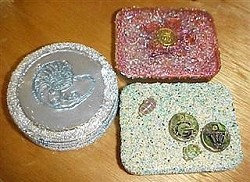
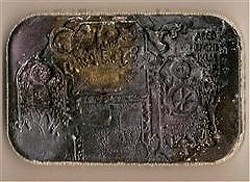
This particular project will hopefully yield a tin whose top has been altered by layers of melted embossing powder, with an imprint of a stamp in the last layer. My experience has been that silver UTEE is more of a pewter finish than shiny silver like regular embossing powder produces. However, UTEE is much thicker, so it builds up more quickly.
I beaded the inside of the lid, too, just to cover up that backwards “Altoids” embossing! LOL The last thing I did was pour on a beautiful turquoise blue glitter to fill in any little spaces in the micro beads. The result is a blue sparkle.
Step 1:
Using the embossing inkpad, cover the top of the tin’s lid by pressing the pad directly on the lid. You need to cover the top surface.
Using the embossing inkpad, cover the top of the tin’s lid by pressing the pad directly on the lid. You need to cover the top surface.
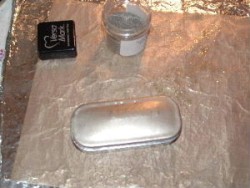
Step 2:
Place your tin in a container or a Tidy Tray and pour your choice of embossing powder over the ink. Tap the extra off into the container to be poured back into the EP bottle. Turn on your heat gun and let it get red hot before aiming it at the top of the tin. Heat until that layer of EP is melted. As soon as it has cooled a little, repeat the process: embossing ink, EP, heat gun. Do as many layers as needed to cover any embossing in the metal, if you are using one of those tins. If your tin’s lid is flat, just determine how many layers of EP look good. We’re not going for smooth and even here! (You can alternate a layer of UTEE with colored EP, if you desire. The color should be on top.)
Place your tin in a container or a Tidy Tray and pour your choice of embossing powder over the ink. Tap the extra off into the container to be poured back into the EP bottle. Turn on your heat gun and let it get red hot before aiming it at the top of the tin. Heat until that layer of EP is melted. As soon as it has cooled a little, repeat the process: embossing ink, EP, heat gun. Do as many layers as needed to cover any embossing in the metal, if you are using one of those tins. If your tin’s lid is flat, just determine how many layers of EP look good. We’re not going for smooth and even here! (You can alternate a layer of UTEE with colored EP, if you desire. The color should be on top.)

Step 3:
This can be tricky step. You need to stamp the melted layer of embossing powder/UTEE. I actually held the stamp in my left hand (I’m right handed) and the gun in my right. When I saw the EP moving in a liquid fashion, I clicked the gun off, dropped it and switched the stamp to my right hand, pressing it into the hot layer. HOLD the stamp there without moving it. Let the EP cool for several seconds before removing the stamp. If you don’t like the image, re-heat it to melt it and repeat with a layer of EP.
This can be tricky step. You need to stamp the melted layer of embossing powder/UTEE. I actually held the stamp in my left hand (I’m right handed) and the gun in my right. When I saw the EP moving in a liquid fashion, I clicked the gun off, dropped it and switched the stamp to my right hand, pressing it into the hot layer. HOLD the stamp there without moving it. Let the EP cool for several seconds before removing the stamp. If you don’t like the image, re-heat it to melt it and repeat with a layer of EP.

Step 4:
When the tin is nice and cool (it does get hot!), tape the rim of the tin with O'So Sticky Tape. Leave the liner on. Then tape around the sides of the bottom. Taping the very bottom of the tin isn’t necessary, but it’s always an option.
When the tin is nice and cool (it does get hot!), tape the rim of the tin with O'So Sticky Tape. Leave the liner on. Then tape around the sides of the bottom. Taping the very bottom of the tin isn’t necessary, but it’s always an option.
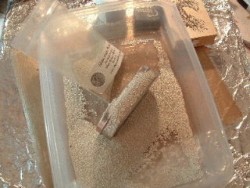
Step 5:
Peel off the top liner from all the O'So Sticky Tape and set the tin in a container. Pour on your choice of micro beads; then press the tin into the beads in the container, being careful to cover all exposed O'So Sticky Tape. "Seat" the beads with your fingers.
Peel off the top liner from all the O'So Sticky Tape and set the tin in a container. Pour on your choice of micro beads; then press the tin into the beads in the container, being careful to cover all exposed O'So Sticky Tape. "Seat" the beads with your fingers.
Examples
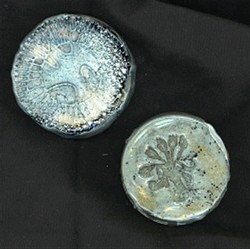
Stephanie

Jean
Georgia
Bridget
Marianne