Stamping on Beads

By Suzanne Glazier
Supply List:
- A SOLID stamp - or something MOSTLY solid. Details DO NOT work well for this technique!
- Versamark Pad or Pen
- Assorted Cardstock
- Two colors of beads (we used red opaque and clear on the sample)
- O'So Sticky Tape Sheets
- Decorative ribbon, Krylon Pen and/or other favorite stamping accents!
- If you have an old or additional hard rubber brayer - it will come in handy!

Directions:
Note:
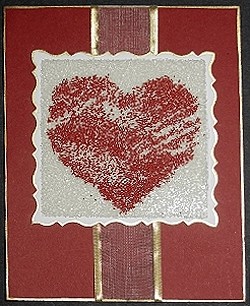
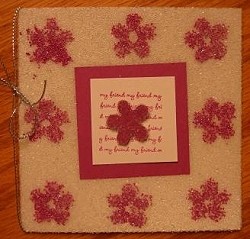
Bead Stamping Technique to create a Stamped Beads Heart Card
Step 1:
Cut a piece of red cardstock 8 1/2" by 5 1/2". Score and fold in half.
Step 2:
Cut a piece of white cardstock 3 1/2" square.
Step 3:
Use decorative scissors on all four sides of the white cardstock piece.
Step 4:
Edge both pieces of cardstock with a gold Krylon pen.
Step 5:
Place red opaque and clear translucent micro beads into flat dishes or craft trays (Keep the two colors separate.
Step 6:
Cut a sheet of O'So Sticky Tape 3" square. Peel off one liner and carefully center it on the front of the white square – sticky side down.
Step 7:
Remove the top liner from the O'So Sticky Tape but keep it handy. Use a solid or mostly solid stamp for best results. The heart stamp used is from Dream Impressions.
"Ink" your stamp with a Versamark pad and then tap the stamp several times into red opaque micro beads. Carefully stamp the beads onto the center of the exposed O'So Sticky Tape. Brush away any beads left on your stamp with a soft toothbrush.
Step 8:
Replace the liner over the stamped beads and tape. Use an old hard rubber brayer or the palm of your hand to firmly press the beads into the tape. Remove the liner again.
Step 9:
Now place the stamped side down into a tray of clear micro beads and press firmly from behind. You many need to lift and repeat a few times for maximum coverage. The clear beads will also cover the previously stamped red ones, so you will need to gently brush the clear beads from the top of the red beaded areas to expose the image again.
Step 10:
Use an old brayer or the palm of your hand to press the beads firmly into the O'So Sticky Tape. If the room is cool, you can gently warm the tape with your embossing tool to make the tape softer. Then brayer the beads firmly down into the tape.
Step 11:
Add a strip of gold edged ribbon to the card front and layer the white square onto the red cardstock over it.
Note:
Bead Stamping Technique to create a Stamped Beads Heart Card
Step 1:
Cut a piece of red cardstock 8 1/2" by 5 1/2". Score and fold in half.
Step 2:
Cut a piece of white cardstock 3 1/2" square.
Step 3:
Use decorative scissors on all four sides of the white cardstock piece.
Step 4:
Edge both pieces of cardstock with a gold Krylon pen.
Step 5:
Place red opaque and clear translucent micro beads into flat dishes or craft trays (Keep the two colors separate.
Step 6:
Cut a sheet of O'So Sticky Tape 3" square. Peel off one liner and carefully center it on the front of the white square – sticky side down.
Step 7:
Remove the top liner from the O'So Sticky Tape but keep it handy. Use a solid or mostly solid stamp for best results. The heart stamp used is from Dream Impressions.
"Ink" your stamp with a Versamark pad and then tap the stamp several times into red opaque micro beads. Carefully stamp the beads onto the center of the exposed O'So Sticky Tape. Brush away any beads left on your stamp with a soft toothbrush.
Step 8:
Replace the liner over the stamped beads and tape. Use an old hard rubber brayer or the palm of your hand to firmly press the beads into the tape. Remove the liner again.
Step 9:
Now place the stamped side down into a tray of clear micro beads and press firmly from behind. You many need to lift and repeat a few times for maximum coverage. The clear beads will also cover the previously stamped red ones, so you will need to gently brush the clear beads from the top of the red beaded areas to expose the image again.
Step 10:
Use an old brayer or the palm of your hand to press the beads firmly into the O'So Sticky Tape. If the room is cool, you can gently warm the tape with your embossing tool to make the tape softer. Then brayer the beads firmly down into the tape.
Step 11:
Add a strip of gold edged ribbon to the card front and layer the white square onto the red cardstock over it.
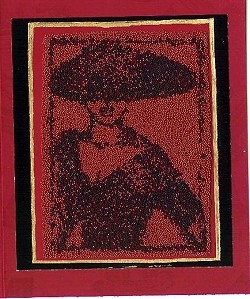
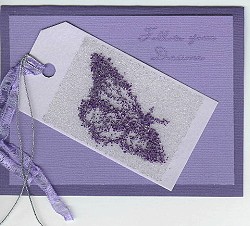
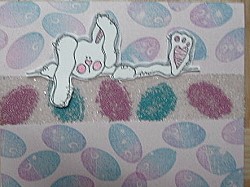
Examples
Char Wilson
Erin McDaniel
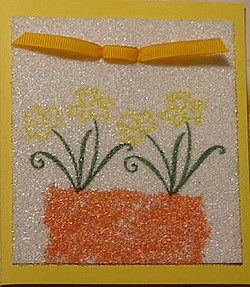
Lisa Heusler
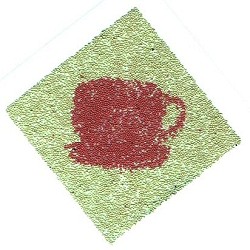
Suzanne Glazier