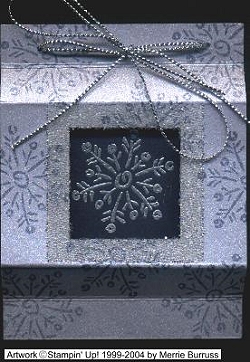
Shadow Box Two Sided Ornaments

By Merrie Burruss
Supply List:
- Two pieces of card stock (CS) 4"x 3" [outside pieces]
- One piece of CS 3 3/4" x 2 3/4" [inside piece]
- White CS
- Large square punch (I used SU's 1 3/8")
- Scoring blade for paper cutter
- PWA Micro Beads
- 1/4" O'So Sticky Tape
- 1/16" punch
- cord

Directions:
Step 1:
With the outside piece (4x3") in landscape direction, score each end at half an inch. [Do this with both pieces.]
Step 2:
Okay, now flip the CS over and score each end at 1". Do this to both pieces.
Step 3:
Hold the piece you just scored in your hand in landscape direction and punch a square in the center. If you're using Stampin' Ups large square punch, your CS will fit all the way into the punch. Use the score marks on either side as a guide to where the center is. Do this with both pieces.
Step 4:
If you're going to stamp on your ornament (outside pieces) do so now.]
Outline the square you just punched with 1/4" O'So Sticky Tape.** Do both pieces, remove red liner and bead. Set these two pieces of CS aside. **Another way to outline the 'window' with O'So tape would be to use a piece of O'So tape that is 1 7/8 x 1 7/8 (for the SU large punch) and cut out the center with the square punch or your paper cutter. This will leave a 1/4" border of tape. I hope this makes sense. LOL
Step 5:
This is an easy step... just stamp! Stamp your image(s) on white (or other neutral) CS and color as desired. You want this piece to be seen through your window you just made. I like to do a graphic on the front and a greeting on the back of my ornament.
Step 6:
Okay, here's where it gets tricky to explain. First, fold your pieces (with the windows) on the scored lines. Now, put glue or double sided tape on the back side along the very ends of ONE of your outside pieces. You only want tape on the first and last 'sections' of your CS piece. Adhere the inside piece to ONE end. Put tape on the back of your stamped image and slip it under the window and tape it to the inside piece. Adhere the other end of the outside piece to the inside piece. Turn over and do the same to the back. WOW... this sounds so confusing. Take a look at the samples (especially side view) for reference.
Note from Marianne: Ok if I did it right you will end up with the top pieces of the front and back being glued together at the top with the image piece sandwiched between. So it will look like a milk carton at the top when folded. A milk carton like the 1/2 gallon size not the plastic jug type. Then you just copy that on the bottom. --Marianne [Thanks for a GREAT explanation, Marianne!]
Step 7:
Now you have your ornament assembled and it looks great, doesn't it?! Punch two holes in the top and tie it with cord or ribbon. In the sample, I used a 1/16" punch and two strands of cord.
We're all done! I hope you guys had fun tonight. I did! I can't wait to see the samples everyone has made.
These can be further embellished using eyelets, ribbon or beaded trim dangling from bottom. You are only limited by your imagination!
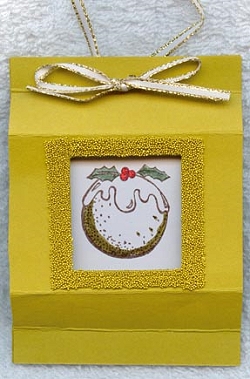
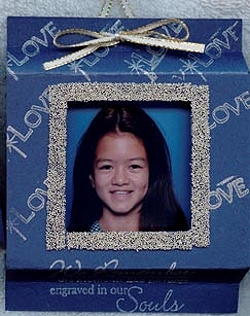
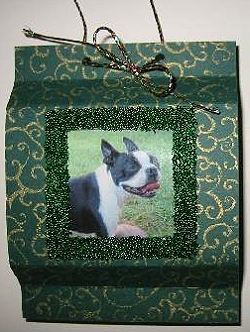
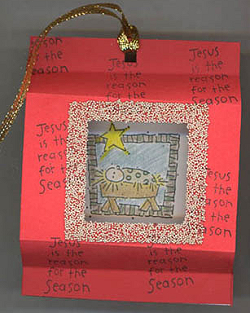
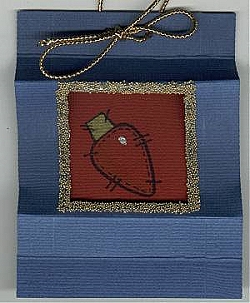
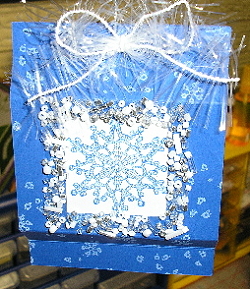
Examples
Bridget Larsen
Bridget Larsen
MC Fox
Stephanie Loomis
Marianne Colschen
Karen Gibson