Puzzle Pieces

By Evelyn Spikes
Supply List:
- Puzzle pieces
- Electric griddle OR low-blowing heat gun
- Non-stick, heat-resistant craft sheet
- Cardboard covered in aluminum foil for cooling pieces
- Tweezers or some tool to manipulate hot pieces
- Black Ultra Thick Embossing Enamel (UTEE)
- Versamark or other pigment ink
- Stamps of choice - remember that you can use part of an image effectively; however, if you have a very small stamp, you can impress the entire image.
- Pearl Ex, your choice of colors
- Colored Embossing Powders of your choice
- Micro Beads
- Optional: Rub-on metallics or colors

Directions:
NOTES:
Gather all your supplies so they are within easy reach. When things get hot, sometimes you have to move fast! Instructions given first are for the griddle, and then the low-blowing heat gun.
Step 1:
Place your non-stick craft sheet on the griddle and turn the thermostat to 350 degrees. (For low-blowing heat gun use: Cover a large sheet of cardboard with foil for your work area. Lay the craft sheet in the center.)
Step 2:
We'll start with black UTEE....that means you can use a plain puzzle piece or a printed one. Cover the piece with Versamark or other clear embossing ink by the DTP method. This helps the UTEE to stick to the piece. Place the puzzle piece in the center of this craft sheet. Ink your stamp of choice with Versamark or a colored pigment ink. Lay the stamp, rubber side up, near your work surface.
Step 3:
Using a small spoon or scoop, cover the surface of the puzzle piece with black UTEE powder. Be generous, but there's no reason to have a lot of it sliding off onto the craft sheet. On the griddle, just watch it melt! (If you are using a gun, turn the gun on and hold it about 7 inches above the piece - I conducted a scientific experiment as to distance! When you see the powder start to melt, you can move the heat gun a little closer. Only when it has liquefied, can you move the heat closer.)
Step 4:
Add another layer of UTEE to the liquefied one. Melt it as you did the first. Two to three layers of UTEE leads to the best results, but if it's all running off onto the craft sheet, don't add more! REMEMBER...IT'S HOT!
Step 5:
Now you can add other substances: sprinkle your choice of Pearl Ex or Perfect Pearls color in a couple of areas; sprinkle colored regular embossing powder on as an accent. Beads DON'T do well here: the melted UTEE swallows them. They do add a little texture, however. (If you're using a gun, heat the new substances until they melt into the UTEE.)
Step 6:
This is the tricky part, but practice makes perfect...almost! For those of you using the griddle, move a piece of foil close by. Using tweezers, pull the craft sheet close to the edge of the griddle until the puzzle pieces 'hangs over' the edge. What you want to do is to slide it onto the foil piece, right side up. This, however, necessitates some tricky handling. REMEMBER....IT'S HOT! (For those using the heat gun, the process is somewhat easier. Just turn the gun off! You can move the piece to a portion of the craft sheet that isn't covered in melted UTEE... but move quickly!)
Step 7:
Withi 3-5 seconds, press the inked stamp onto the puzzle piece. Straight down is the best move, but don't wiggle! It sets up very rapidly, but you should hold it there for a few seconds. Then remove it. You can handle the piece by this time.
Withi 3-5 seconds, press the inked stamp onto the puzzle piece. Straight down is the best move, but don't wiggle! It sets up very rapidly, but you should hold it there for a few seconds. Then remove it. You can handle the piece by this time.
Step 8:
You can use metallic or colored rub-on to accent the design.
At this point, you will decide whether or not you can live with this particular embossed piece. If you just can't stand it, put it back on the griddle and melt it... or put it back on the foil and turn the gun on! The only drawback might be the way the colors melt the second time. Just repeat Step 6.
With three hands, you could stamp and add beads at the same time. I've just never been successful with that, though. If the UTEE cools at all, the beads won't stick. If the UTEE cools at all, the stamp won't make an impression.
With a tiny puzzle piece, you can choose a tiny stamp and highlight it with some rub-on color. I was successful with those little stamps that many SU! demos give out at make-n-takes. However, I believe that a portion of a larger stamp is the most effective for these pieces. You're not going for exactness here, but for the effect. Choose stamps that don't have a lot of 'flat' surfaces; you want texture.
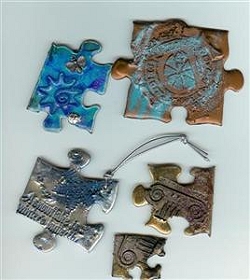
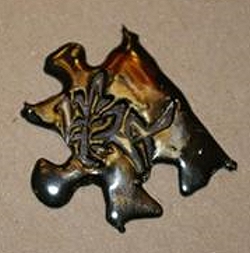
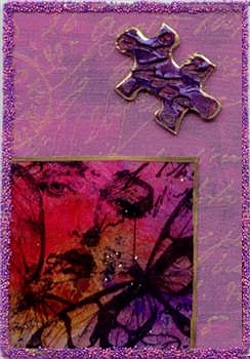
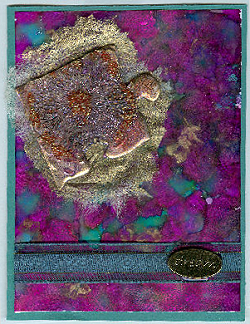
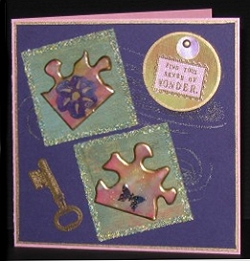
The large puzzle piece that's the class sample was created with platinum UTEE, with some Black Sparkle EP on a couple of corners and plain bright red EP across two sides. Notice how the red came out in the one butterfly image at the lower right. The bronze and turquoise piece was created with bronze UTEE, some copper EP and some turquoise EP.
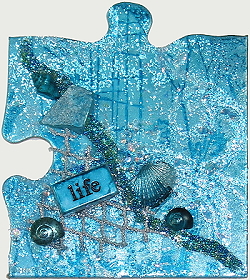
Oh, mustn't forget those plain white puzzle pieces. I colored one with blue alcohol inks and melted clear UTEE on it. I mixed in some holographic EP on the second layer, added a blue wire shape, a silver bead, and a butterfly charm. That's only the beginning for those white ones!
The large puzzle piece that's the class sample was created with platinum UTEE, with some Black Sparkle EP on a couple of corners and plain bright red EP across two sides. Notice how the red came out in the one butterfly image at the lower right. The bronze and turquoise piece was created with bronze UTEE, some copper EP and some turquoise EP.
Oh, mustn't forget those plain white puzzle pieces. I colored one with blue alcohol inks and melted clear UTEE on it. I mixed in some holographic EP on the second layer, added a blue wire shape, a silver bead, and a butterfly charm. That's only the beginning for those white ones!
Embellishments:
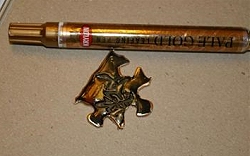
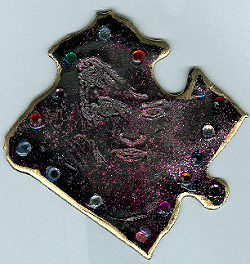
The embellishment possibilities are limited only by the size. I like to edge my embossed puzzle pieces with a Krylon metallic pen, too. It's especially effective on the pieces made with black UTEE.
USING BEADS: Everyone should try adding some beads to a piece or two. Except for adding the texture in melted UTEE, I suggest using a dimensional clear adhesive such as Diamond Glaze, Glossy Accents, etc. to a chosen spot on your piece and then adding the beads.
Other embellishment options: while the last layer of UTEE is still hot, you can add anything that won't melt or burn up! Buttons, wire shapes, charms, jewels, etc., etc.
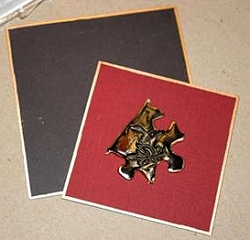
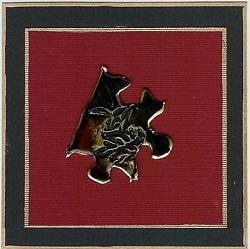
Layers your puzzle piece on cardstock for a card that is perfect for any occasion!
The embellishment possibilities are limited only by the size. I like to edge my embossed puzzle pieces with a Krylon metallic pen, too. It's especially effective on the pieces made with black UTEE.
USING BEADS: Everyone should try adding some beads to a piece or two. Except for adding the texture in melted UTEE, I suggest using a dimensional clear adhesive such as Diamond Glaze, Glossy Accents, etc. to a chosen spot on your piece and then adding the beads.
Other embellishment options: while the last layer of UTEE is still hot, you can add anything that won't melt or burn up! Buttons, wire shapes, charms, jewels, etc., etc.
Layers your puzzle piece on cardstock for a card that is perfect for any occasion!
Examples
Suzanne Glazier
Bridget Larsen
Beth Ullman
Beth Ullman
Yvonne Grimes

Bridget Larsen