Heat Embossing

By Suzanne Glazier
Supply List:
- Cardstock
- Simple Line Stamp
- Heat Gun
- Clear and Colored Embossing Powder
- Tidy Tray
- Pigment Ink
- Versamark
- Sheet of Paper
- Anti-Static Bag
Evelyn Spikes


Introduction:
When you emboss an image, you must have wet ink to achieve your purpose. Pigment inks are slow-drying and even "sticky." That makes them the choice for embossing. Embossing ink, such as Versamark, is a clear medium that can be used with clear powder to create a clear image, OR it can be colored by the use of colored embossing powder.
Embossing powders come in as many colors as you can think of. When you are just starting, you would probably be better off to limit your EP to clear, black, and metallics of your choice. (Gold, silver, bronze, copper, verdigris are only some of the metallic EP's available.) Oh, go for it! Don't limit yourself!! LOL
Cardstocks: You will get the best results with a smooth cardstock. Textured cardstocks can be used, but you will need to experiment with the stamping first. Emboss on smooth and layer on textured cardstock.
Notes:
I find gold EP to be a "pain" more often than not. Metallic embossing powders are very clingy, and gold is the clingiest! This is where you might want to use an anti-static bag...it looks like a miniature resin bag used by baseball pitchers. SU! calls it an Embossing Buddy, I think. You can rub it over the cardstock where you are going to stamp your clear ink. Then you stamp and pour on the gold powder. It's supposed to stick only to the ink, but I sometimes end up with a gold "haze" outside the image. When it works, it is so pretty!
When those metallic powders start to melt, it's so exciting! They create beautiful effects.
Embossing powders come in the regular and "detail" or "fine detail" types. (The extra thick and ultra thick EP's will be addressed in a later class.)
If you have a stamp with lots of detail, you will get much better results if you choose a detail embossing powder.
Your bold stamps with the simple lines will do well with any regular embossing powders.
When you emboss, you can create wonderful effects which add sparkle and texture to your work.
Embossing powder needs a slow-drying ink base. That's why pigment inks and embossing (sometimes called "watermark") inks are the best. Dye inks don't stay wet or "sticky" long enough for embossing powder.
Directions:
Step 1:
Choose your ink, embossing powder (EP) and stamp. If you want to use a beautiful EP, stamp your image in clear ink to achieve that color. If you have a certain color of pigment ink that you want to use, use clear EP so the ink color will show through.
Step 2:
Stamp your image on your choice of cardstock. (Working under good light allows you to see the 'wet' and the 'shiny' that's so important in heat embossing." Place the cardstock on a piece of copy paper or in a Tidy Tray.
Step 3:
Sprinkle your choice of EP very generously onto the image. It will cling to the stamped areas. Don't touch the image!
Step 4:
Tap off any loose powder onto the piece of paper (or into the tray). A good flick of the finger on the back of the cardstock is an excellent technique. If necessary, you can use a soft brush to get stubborn powder, but don't brush the powdered image.
Step 5:
At this point, return the excess powder to that little bottle. If you are working on paper, gently fold the paper and use it as a funnel. The Tidy Tray has a little neck for this purpose.
Step 6:
Holding the cardstock carefully by the edge, apply heat with your heat gun. You will learn what the best distance is for your gun, but 1-2 inches will work. The powder will begin melting and raising. Don't keep the heat in one place for very long. (Flames are NOT a good sign!)
It is also possible to emboss with a hot plate, toaster oven, iron, or other heat source underneath the cardstock, but it's pretty tricky! You can end up with scorched cardstock without even trying!
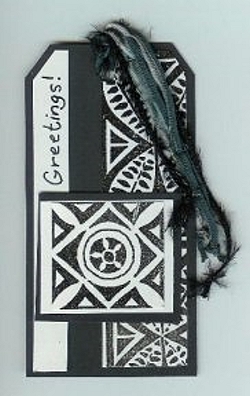
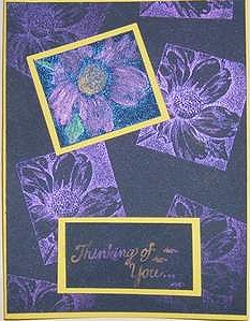
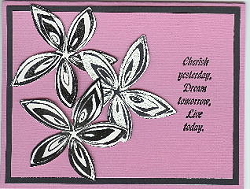
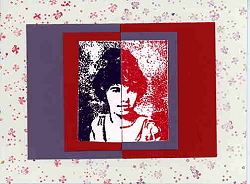
Examples
Diane Martin
Evelyn Spikes

Suzanne Glazier
Evelyn Spikes
Lisa Heulser