Direct to Rubber Watercolor Techniques

By Kelly Morrison
Supply List:
- Spray bottle with water in it.
- Matte (not glossy) Paper You may want to experiment with watercolor paper.
- Shadow stamp(s)
- Solid image stamp(s)
- Open line image stamp(s)
- Open line background stamp(s)
- Dye ink markers
- Twinkling H2Os
- Watercolor pencils
- Watercolor crayons
- Water soluble oil pastels
- Water brush

NOTES:
With this class, will take some time to play, experiment and discover the joys of direct-to-rubber stamping using a variety of water soluble products. Whether you have just one of these products or more, this is your chance to try out this technique and decide what you like best!
First of all, if you have "Twinks" (Twinkling H2Os) get their lids off and spritz them all with water and set them aside to give the colors time to activate. We will come back to Twinks later.
How you use water is the key to your control, particularly when doing the "direct to rubber" techniques we'll create with tonight. Too much water will mean the colors will bleed and you will lose all definition of your stamp.
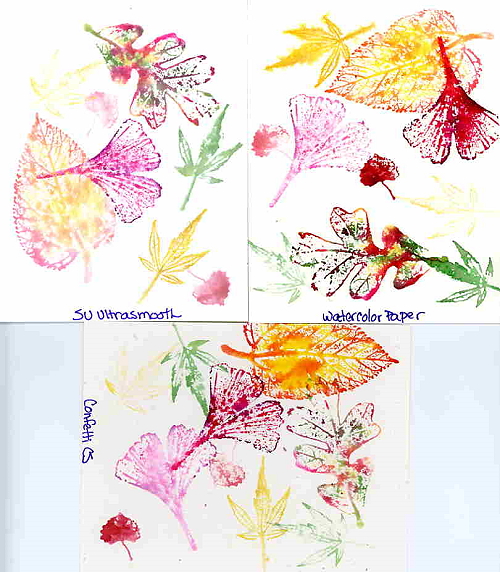
Also, watercolor paper works far better than any other cardstock. (This doesn't mean that you won't get pleasing results from regular cardstock.)
Important tools: a water spritzer bottle, kitchen sponge or cotton towel in a small dish of water.
Directions:
Direct to Rubber - with Markers
We will start with markers because almost everyone has markers on hand. Do NOT use Sharpies! You want to use the regular broad point or brush point markers.
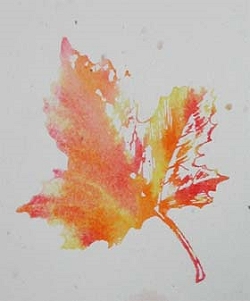
Choose a fairly detailed line-image stamp, like of a leaf or peacock feather or dragonfly or something along those lines. On your DRY stamp, starting with your lightest color and working to your darkest, color with your markers directly onto the rubber.
Now, with ALL of the techniques tonight you can try three different things:
1) Spritz the stamp with water and then stamp. Spritz again and stamp again. Repeat until all the color is used up.
2) Spritz the paper with water and then stamp.
3) Spritz the paper and the stamp.
Oh, I really like to hold the stamp onto the paper for awhile to let the colors disperse onto the paper. You can experiment with this over the course of the evening.
Thumping:
Here is another technique to try with your markers, it's called "thumping".
Color all over your stamp with a light color. Now, choose 2-3 darker colors. One at a time apply your darker colors like this: Hold the marker in your hand sort of like a drum stick and bounce the tip randomly on your stamp. (Hence: "thumping")
Now, spritz your stamp with water and stamp! Repeat the spritz and stamp until no more color is left to stamp with.
Use the same instructions, but try using a solid/bold image stamp.
This is a fabulous way to get varigated color results with your "shadow" or "pallette" stamps. For those I tend to color the center of the stamp a light color, then color a little farther out with a slightly darker color in the same color family, and finally the darkest color around the edges. For example, yellow, orange, red.
If you are going to be stamping another image on top, typically a detail/line image or words, you don't want to use super dark colors on your shadow stamp.
This is the one technique, using markers, that you can use on glossy cardstock tonight. Because the glossy resists the watercolor rather than absorbing/dispersing it, you will get a different effect. When using glossy paper you want to use a very light application of water.
Watercolor Crayons
Okay, with the water color crayons here are some direct to rubber basics/options:
*You can color on a dry crayon and stamp on wet paper. Be sure to hold the stamp against the paper and give the color time to disperse. You will get a lighter effect with this, most times. You should be able to spritz and stamp a couple of times and still get impressions.
*For more vibrant color, spritz your stamp first and then color directly onto the wet stamp and stamp. Spritz and stamp again, repeat until no more color on the stamp.
*Spritz your paper and apply color to a wet stamp and stamp.
You can use multiple colors on one stamp, blending colors directly on the stamp. Just have fun and experiment!
Shadow stamp or Two-Step Stamping
Oh, you can also tap your stamp against a wet kitchen sponge in order to get it wet. It's all a matter of experimenting to learn just how wet is wet enough and how wet is too wet.
Two-Step Stamping/Shadow stamping
If/when you are using a two-step stamp, the first background part of the image can be wetter. Too dry, and the crayons don't release their colors onto the paper. So finding a balanced control is the key.
Line Image/Detail Stamps
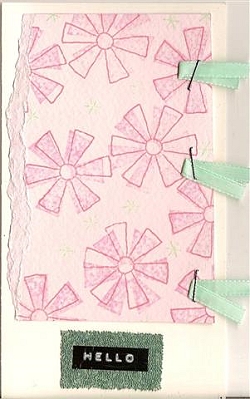
There are several cool things about using water color crayons on a line image stamp, I'm talking about a line image of say, flowers or a person or mountains.
First of all, you want to use a little less water whether you are spritzing the stamp or the paper. You want the image to have the watercolor look, but the image to still be distinctive.
I think that a line image looks truly water colored using this technique, and, since I cannot paint freehand, I love the fact that I can get this result using a rubber stamp! LOL
Again, you can use any of the options:
* Color on dry crayon, spritz then stamp.
* Color on wet crayon, then stamp.
* Spritz paper, color on dry crayon, then stamp.
* Color on wet crayon, spritz paper, then stamp.
Once the image is stamped you can use a water brush to enhance the effects of the watercoloring by dragging against the lines of the image. You can also touch your water brush right to other crayon colors to add color to the open areas of the stamp image.
Direct to Brayer
You can use these same principles with either your crayons or your markers and your brayer! I have noticed that the color is quickly dispersed from my brayer. I've created some fun backgrounds, most end up being fairly pastel, not real vibrant.
Oil Pastels vs. Crayons
I have a set of water soluble oil pastels. They were fairly inexpensive to buy. I find that the effect is similar to the H2O crayons just with less vibrant colors. I found that they worked best when applied to a wet stamp. When applied to a dry stamp the colors were much to light for my tastes.
Twinkling H2O's
Okay, by now your Twinks should be activated. (You activate the colors by spritzing with water and letting them sit just awhile.)
You will need a dry paintbrush for this. You may also use a sponge applicator.
This technique works best with a bold/solid image stamp.
Your paint should soften in the pot from the spritzing. You should be able to mix and pick-up paint in a creamy consistency with your paint brush. Brush this paint directly across/onto your rubber stamp. Note: Too much paint will create a blob of color when stamped. Be careful.
Be sure to dry your paint brush well after rinsing between color applications, this way your paint will not get too watery. You want the consistency to stay creamy.
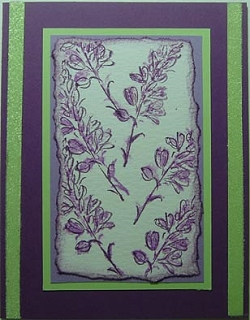
Now, go ahead and stamp. Spritz the stamp with water and stamp again. Repeat. You should be able to get several stampings from one application of Twinks. A solid/bold image will get 3-4 stampings, an image with more lines (like a skeleton leaf image) may get 8-16.
NOTE:
Lay your stamp flat when spritzing to make sure the colors don't run together. If you hold it up when you spritz the colors may run into each other. OH this is true when spritzing with the other mediums (crayons, markers, etc.)
With this class, will take some time to play, experiment and discover the joys of direct-to-rubber stamping using a variety of water soluble products. Whether you have just one of these products or more, this is your chance to try out this technique and decide what you like best!
First of all, if you have "Twinks" (Twinkling H2Os) get their lids off and spritz them all with water and set them aside to give the colors time to activate. We will come back to Twinks later.
How you use water is the key to your control, particularly when doing the "direct to rubber" techniques we'll create with tonight. Too much water will mean the colors will bleed and you will lose all definition of your stamp.
Also, watercolor paper works far better than any other cardstock. (This doesn't mean that you won't get pleasing results from regular cardstock.)
Important tools: a water spritzer bottle, kitchen sponge or cotton towel in a small dish of water.
Directions:
Direct to Rubber - with Markers
We will start with markers because almost everyone has markers on hand. Do NOT use Sharpies! You want to use the regular broad point or brush point markers.
Choose a fairly detailed line-image stamp, like of a leaf or peacock feather or dragonfly or something along those lines. On your DRY stamp, starting with your lightest color and working to your darkest, color with your markers directly onto the rubber.
Now, with ALL of the techniques tonight you can try three different things:
1) Spritz the stamp with water and then stamp. Spritz again and stamp again. Repeat until all the color is used up.
2) Spritz the paper with water and then stamp.
3) Spritz the paper and the stamp.
Oh, I really like to hold the stamp onto the paper for awhile to let the colors disperse onto the paper. You can experiment with this over the course of the evening.
Thumping:
Here is another technique to try with your markers, it's called "thumping".
Color all over your stamp with a light color. Now, choose 2-3 darker colors. One at a time apply your darker colors like this: Hold the marker in your hand sort of like a drum stick and bounce the tip randomly on your stamp. (Hence: "thumping")
Now, spritz your stamp with water and stamp! Repeat the spritz and stamp until no more color is left to stamp with.
Use the same instructions, but try using a solid/bold image stamp.
This is a fabulous way to get varigated color results with your "shadow" or "pallette" stamps. For those I tend to color the center of the stamp a light color, then color a little farther out with a slightly darker color in the same color family, and finally the darkest color around the edges. For example, yellow, orange, red.
If you are going to be stamping another image on top, typically a detail/line image or words, you don't want to use super dark colors on your shadow stamp.
This is the one technique, using markers, that you can use on glossy cardstock tonight. Because the glossy resists the watercolor rather than absorbing/dispersing it, you will get a different effect. When using glossy paper you want to use a very light application of water.
Watercolor Crayons
Okay, with the water color crayons here are some direct to rubber basics/options:
*You can color on a dry crayon and stamp on wet paper. Be sure to hold the stamp against the paper and give the color time to disperse. You will get a lighter effect with this, most times. You should be able to spritz and stamp a couple of times and still get impressions.
*For more vibrant color, spritz your stamp first and then color directly onto the wet stamp and stamp. Spritz and stamp again, repeat until no more color on the stamp.
*Spritz your paper and apply color to a wet stamp and stamp.
You can use multiple colors on one stamp, blending colors directly on the stamp. Just have fun and experiment!
Shadow stamp or Two-Step Stamping
Oh, you can also tap your stamp against a wet kitchen sponge in order to get it wet. It's all a matter of experimenting to learn just how wet is wet enough and how wet is too wet.
Two-Step Stamping/Shadow stamping
If/when you are using a two-step stamp, the first background part of the image can be wetter. Too dry, and the crayons don't release their colors onto the paper. So finding a balanced control is the key.
Line Image/Detail Stamps
There are several cool things about using water color crayons on a line image stamp, I'm talking about a line image of say, flowers or a person or mountains.
First of all, you want to use a little less water whether you are spritzing the stamp or the paper. You want the image to have the watercolor look, but the image to still be distinctive.
I think that a line image looks truly water colored using this technique, and, since I cannot paint freehand, I love the fact that I can get this result using a rubber stamp! LOL
Again, you can use any of the options:
* Color on dry crayon, spritz then stamp.
* Color on wet crayon, then stamp.
* Spritz paper, color on dry crayon, then stamp.
* Color on wet crayon, spritz paper, then stamp.
Once the image is stamped you can use a water brush to enhance the effects of the watercoloring by dragging against the lines of the image. You can also touch your water brush right to other crayon colors to add color to the open areas of the stamp image.
Direct to Brayer
You can use these same principles with either your crayons or your markers and your brayer! I have noticed that the color is quickly dispersed from my brayer. I've created some fun backgrounds, most end up being fairly pastel, not real vibrant.
Oil Pastels vs. Crayons
I have a set of water soluble oil pastels. They were fairly inexpensive to buy. I find that the effect is similar to the H2O crayons just with less vibrant colors. I found that they worked best when applied to a wet stamp. When applied to a dry stamp the colors were much to light for my tastes.
Twinkling H2O's
Okay, by now your Twinks should be activated. (You activate the colors by spritzing with water and letting them sit just awhile.)
You will need a dry paintbrush for this. You may also use a sponge applicator.
This technique works best with a bold/solid image stamp.
Your paint should soften in the pot from the spritzing. You should be able to mix and pick-up paint in a creamy consistency with your paint brush. Brush this paint directly across/onto your rubber stamp. Note: Too much paint will create a blob of color when stamped. Be careful.
Be sure to dry your paint brush well after rinsing between color applications, this way your paint will not get too watery. You want the consistency to stay creamy.
Now, go ahead and stamp. Spritz the stamp with water and stamp again. Repeat. You should be able to get several stampings from one application of Twinks. A solid/bold image will get 3-4 stampings, an image with more lines (like a skeleton leaf image) may get 8-16.
NOTE:
Lay your stamp flat when spritzing to make sure the colors don't run together. If you hold it up when you spritz the colors may run into each other. OH this is true when spritzing with the other mediums (crayons, markers, etc.)
Examples
Lisa Heusler
Julie Outericky
Marianne Colschen
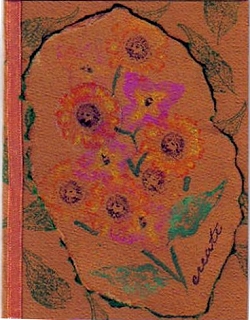
Jean Marchand
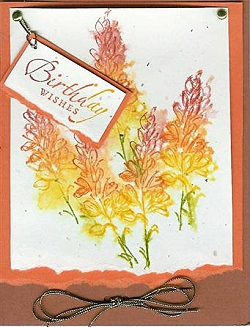
Kathy McDowell
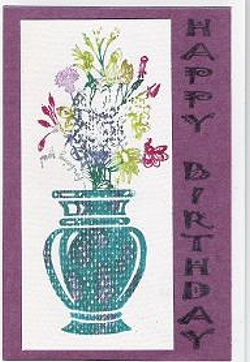
Pam Fuda