Colored Pencil Techniques

By Marianne Colschen
Supply List:
- Colored pencils any brand (NOT watercolor pencils)
- White colored pencil for sure
- White eraser
- Sand paper
- Odorless Mineral Spirits (or neutral shoe polish)
- Paper - cardstock works fine
- Image - something open not too detailed for your first time
- Permanent ink pad
- Pencil sharpener
- Paper stump or tortillion (see notes on making your own)
- Prismacolor Blender
- O'So Sticky Tape
- Micro Beads

NOTES:
I love using waxy colored pencils because the shading and blending process produces quick, easy and stunning results.
I am able to use pencils on just about any medium: On copy paper for backgrounds or to use in iris folding, on fabric, on tiles that have been sprayed with a fixative, on rocks even on wood. Some items are much easier to use colored pencils on and the outcome is great.
Some of the reasons I like colored pencils are: They are very portable. If we are taking a road trip I can just grab my pencils and a few images and the time just flies by in the car. There is no time for waiting for something to dry like you would get with some paints. You don't need to emboss the image to hold the coloring in like paints. Your dollar investment can be a large sum or a frugal sum depending on your pocketbook. There are a wide range of colors to choose from. Pencils are very forgiving if you should make an error.
There are several brand names of this type of pencil: Prismacolor, Dewert, Prang, Crayola, Rose Art and Lyra just to name a few. The brand I prefer is Prismacolor. I like this brand because it is readily available at most craft/hobby stores. This brand gives me a nice intense color and it is very easy to blend.
I don't like my pencils to have a real sharp point because it can leave a line that will be difficult to smooth out so my pencils are on the dull side.
Let's begin coloring! Start by just scribbling some color on a piece of scratch paper (I am using cardstock) I tend to use a circular motion and some lines in my laying down of color. Leave about 1/2" space between the patches. Do several patches of the same color. I labeled each type of blending I plan on trying so I could determine which result I like the best.
****PRECAUTION****
If you are using the mineral spirits they do have a smell to them even though the can is labeled odorless, so take the precautions listed.
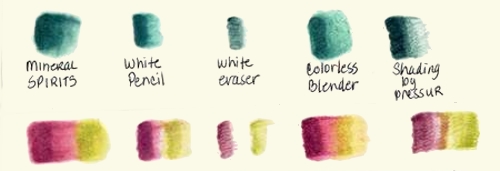
The mineral spirits and stump go hand in hand in the blending process. You want to dip the tip of the stump in the liquid. You do not want your stump to be drippy wet but you do want it to be wet. I know this doesn't make much sense but if you are trying to move the wax/color on the paper and nothing is happening you need to make your stump wetter. If you should get some drops on your paper from the stump being too wet don't become discouraged it will evaporate. So dip your stump in and give it a try. I tend to do this in a circular motion. Don't rub too hard or you may remove some of the paper if it is a thin paper. If you are using more than one color of pencil this is where the sandpaper comes in. Take the tip of your stump and rub it against the sandpaper until all the color is gone. I try to rub the stump on the side of the tip so it stays somewhat pointed.
After I use the mineral spirits sometimes I will go back in and add more color with the pencil to give it more depth.
Using the white pencil I just use a circular motion and begin rubbing. You will see the color change some because you are adding white but it gives it a nice blended look.
The colorless blending pencil is used in the same way as the white pencil but you don't get the white contaminating the color. I don't think you get the same smoothness like you do with the mineral spirits or the white pencil. This is still worth trying especially if smells bother your.
The white eraser is used to blend the colors too! A white eraser is used because it will not rough up the paper like some other erasers. In this case you are removing some of the color not just moving it around. I like to clean my eraser between colors so I don't contaminate where I am coloring. I do this by rubbing it with some all purpose cleaner or on the sand paper. As you can see in the sample if you use the white eraser for shading the entire image would need to be filled in.
If you are using the pencil itself to shade it is all done with pressure. The harder you push on the pencil the darker the color will be - the lighter the pressure the lighter the color. Most times when I do it this way it is because I forgot to bring one of my other blending supplies with me. If you will be using two colors I generally will overlay them a bit so a harsh line is not present.
If you rub your fingers along the samples you would feel that the Mineral Spirits, white eraser and pressure samples are very smooth. The white pencil and colorless blender have a waxy feel to them.
A complete picture tutorial on how to MAKE a tortillion can be found [HERE]
Directions:
Okay, so now stamp up some images and lets begin coloring. I don't emboss my images because I've had the tendency of chipping off the embossing. I use a permanent in pad, something like Memories or Staz On. You will want to test the ink with the mineral spirits to make sure it doesn't smear if you are using a different brand.
I found the mineral spirits did not work on the black paper. Perhaps if I had a different type of paper it would work but since I buy my paper by the ream I didn't have something else to try. In this case I used a combination of the white pencil and pressure.
Accent the design with Micro Beads, using O'So Sticky Tape to adhere them.
If you are using the mineral spirits they do have a smell to them even though the can is labeled odorless, so take the precautions listed.
The mineral spirits and stump go hand in hand in the blending process. You want to dip the tip of the stump in the liquid. You do not want your stump to be drippy wet but you do want it to be wet. I know this doesn't make much sense but if you are trying to move the wax/color on the paper and nothing is happening you need to make your stump wetter. If you should get some drops on your paper from the stump being too wet don't become discouraged it will evaporate. So dip your stump in and give it a try. I tend to do this in a circular motion. Don't rub too hard or you may remove some of the paper if it is a thin paper. If you are using more than one color of pencil this is where the sandpaper comes in. Take the tip of your stump and rub it against the sandpaper until all the color is gone. I try to rub the stump on the side of the tip so it stays somewhat pointed.
After I use the mineral spirits sometimes I will go back in and add more color with the pencil to give it more depth.
Using the white pencil I just use a circular motion and begin rubbing. You will see the color change some because you are adding white but it gives it a nice blended look.
The colorless blending pencil is used in the same way as the white pencil but you don't get the white contaminating the color. I don't think you get the same smoothness like you do with the mineral spirits or the white pencil. This is still worth trying especially if smells bother your.
The white eraser is used to blend the colors too! A white eraser is used because it will not rough up the paper like some other erasers. In this case you are removing some of the color not just moving it around. I like to clean my eraser between colors so I don't contaminate where I am coloring. I do this by rubbing it with some all purpose cleaner or on the sand paper. As you can see in the sample if you use the white eraser for shading the entire image would need to be filled in.
If you are using the pencil itself to shade it is all done with pressure. The harder you push on the pencil the darker the color will be - the lighter the pressure the lighter the color. Most times when I do it this way it is because I forgot to bring one of my other blending supplies with me. If you will be using two colors I generally will overlay them a bit so a harsh line is not present.
If you rub your fingers along the samples you would feel that the Mineral Spirits, white eraser and pressure samples are very smooth. The white pencil and colorless blender have a waxy feel to them.
A complete picture tutorial on how to MAKE a tortillion can be found [HERE]
Directions:
Okay, so now stamp up some images and lets begin coloring. I don't emboss my images because I've had the tendency of chipping off the embossing. I use a permanent in pad, something like Memories or Staz On. You will want to test the ink with the mineral spirits to make sure it doesn't smear if you are using a different brand.
I found the mineral spirits did not work on the black paper. Perhaps if I had a different type of paper it would work but since I buy my paper by the ream I didn't have something else to try. In this case I used a combination of the white pencil and pressure.
Accent the design with Micro Beads, using O'So Sticky Tape to adhere them.
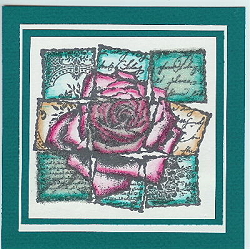
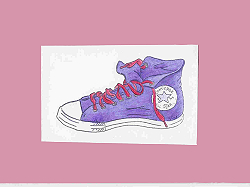
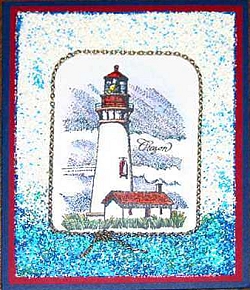
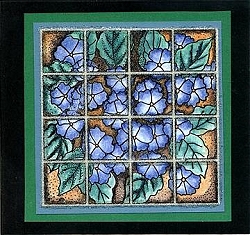
Examples
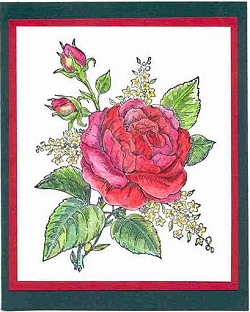
Glenna Schuchman
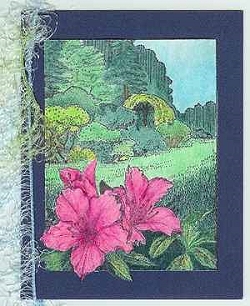
Sue Lorang
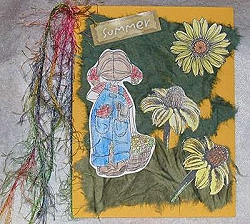
Fly Di