Bottle Cap Books (aka Kaden's Book)

By Dona Deam
Supply List:
- Cardstock for the book and pages
- Scissors
- Fiber
- Bottle Cap
- 1 Inch circle punch
- Stamps
- Ink pads
- PWA micro beads
- O'So Sticky Tape
- O'So Sticky paper back sheet or crystal lacquer
- Regular Hole Punch
- Template [HERE]

Directions:
Step 1:
Cut the template out of cardstock. The template has the inside of the book facing you. If using patterned paper, make sure the part you want for the inside of the cover is facing you when you trace the template. Also trace and cut the inside page using the template or the measurements of 2 1/2 inches by 5 1/2 inches. You can make as many pages as us desire, noting that the more pages, the thicker the book.
Step 2:
Score and fold the book cover on the dash lines.
Fold the page in half crosswise.
Step 3:
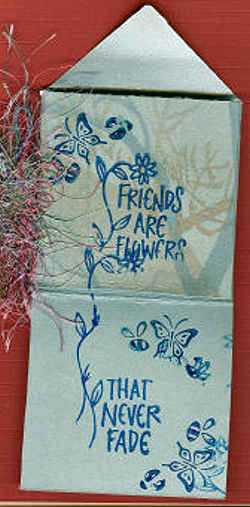
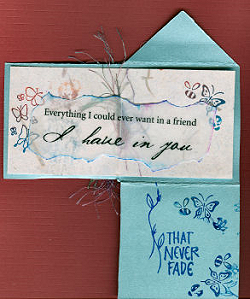
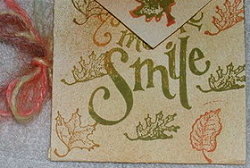
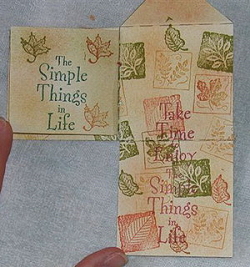
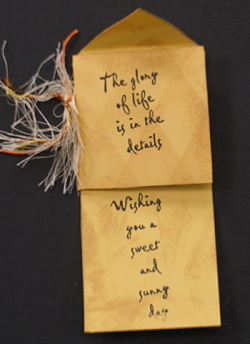
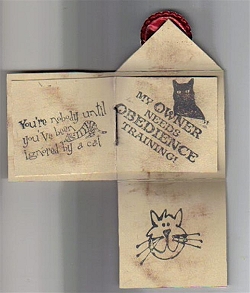
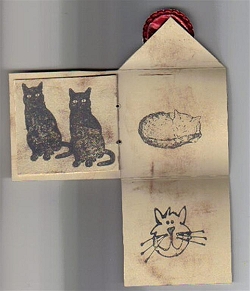
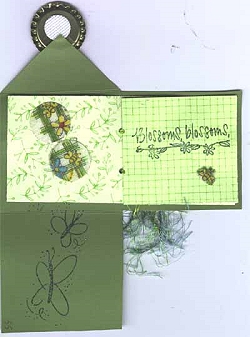
Stamp and embellish the book cover, inside and out as desired.
Also stamp the pages front and back.
Stamp a coordinating, small image to go inside the bottle cap.
This image will need to be about 1 inch in size.
Step 4:
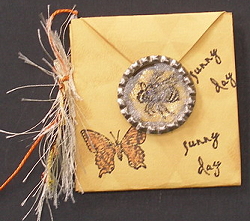
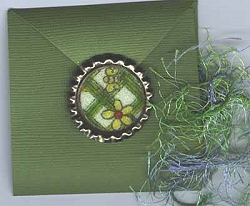
Using a 1-inch circle punch, punch out bottle cap image and put it inside the bottle cap, sticking it down with a small piece of O'So sticky tape. I then used Crystal Lacquer to coat the image and sprinkled on clear micro beads. You can also punch a 1-inch circle from the paper-backed sheets of O'So sticky and cover the image with the O'So sticky and sprinkle the micro beads onto the image. Put a small piece of O'So sticky tape on the back of the bottle cap and set it aside. You will adhere the bottle cap to the front of book in the last step.
Step 5:
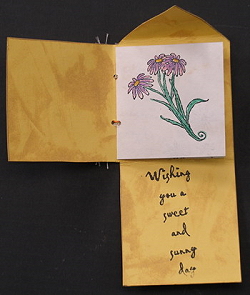
Line up the pages with the horizontal flap matching the fold in the horizontal flap and the page. Punch two holes along the fold for the fiber to hold the page in the book. Or, you can just tie the fiber around the center fold to hold the pages in place. Tie the fiber.
Step 6:
Fold the book up see how much too long the bottom flap is going to be now that the pages are in place. Fold the middle flap over the pages and the bottom flap over the whole thing. Fold the pointed flap down.
Step 7:
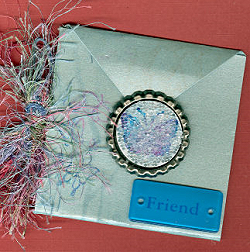
Position the bottle cap to act as a closure for the pointed flap and adhere to the bottom flap. That's it.
But be forewarned, once you make one, you will want to make bunches all sizes.
NOTES:
I found this idea on a website a couple of years ago, printed it off, and filed it away. I pulled it out when I needed something for the bottle cap swap and started to fiddle with it. The original premise of the book was to take an 8 1/2 X 11 inch piece of cardstock, fold it in half lengthwise and then fold it into three equal parts crosswise. If you open the paper up in the and number the squares from the top left hand corner 1 thought 6, you cut off 1 and 5. Cut 2 to a point and tuck it into a slot in 6. You add pages the same size as 3/4, getting 3 pages per sheet of paper. But it doesn't come out even. 6 wasn't flush with the top edge of 3/4 and the point is too long.
I played with the dimensions and came up a template. King Brian took my drawing and created a really nice template for us to use. Thank you King Brian. If you want to make a larger book (or smaller), start with the original book concept of a sheet folded in half and then thirds changing the 3 crosswise folds as needed.
Step 1:
Cut the template out of cardstock. The template has the inside of the book facing you. If using patterned paper, make sure the part you want for the inside of the cover is facing you when you trace the template. Also trace and cut the inside page using the template or the measurements of 2 1/2 inches by 5 1/2 inches. You can make as many pages as us desire, noting that the more pages, the thicker the book.
Step 2:
Score and fold the book cover on the dash lines.
Fold the page in half crosswise.
Step 3:
Stamp and embellish the book cover, inside and out as desired.
Also stamp the pages front and back.
Stamp a coordinating, small image to go inside the bottle cap.
This image will need to be about 1 inch in size.
Step 4:
Using a 1-inch circle punch, punch out bottle cap image and put it inside the bottle cap, sticking it down with a small piece of O'So sticky tape. I then used Crystal Lacquer to coat the image and sprinkled on clear micro beads. You can also punch a 1-inch circle from the paper-backed sheets of O'So sticky and cover the image with the O'So sticky and sprinkle the micro beads onto the image. Put a small piece of O'So sticky tape on the back of the bottle cap and set it aside. You will adhere the bottle cap to the front of book in the last step.
Step 5:
Line up the pages with the horizontal flap matching the fold in the horizontal flap and the page. Punch two holes along the fold for the fiber to hold the page in the book. Or, you can just tie the fiber around the center fold to hold the pages in place. Tie the fiber.
Step 6:
Fold the book up see how much too long the bottom flap is going to be now that the pages are in place. Fold the middle flap over the pages and the bottom flap over the whole thing. Fold the pointed flap down.
Step 7:
Position the bottle cap to act as a closure for the pointed flap and adhere to the bottom flap. That's it.
But be forewarned, once you make one, you will want to make bunches all sizes.
NOTES:
I found this idea on a website a couple of years ago, printed it off, and filed it away. I pulled it out when I needed something for the bottle cap swap and started to fiddle with it. The original premise of the book was to take an 8 1/2 X 11 inch piece of cardstock, fold it in half lengthwise and then fold it into three equal parts crosswise. If you open the paper up in the and number the squares from the top left hand corner 1 thought 6, you cut off 1 and 5. Cut 2 to a point and tuck it into a slot in 6. You add pages the same size as 3/4, getting 3 pages per sheet of paper. But it doesn't come out even. 6 wasn't flush with the top edge of 3/4 and the point is too long.
I played with the dimensions and came up a template. King Brian took my drawing and created a really nice template for us to use. Thank you King Brian. If you want to make a larger book (or smaller), start with the original book concept of a sheet folded in half and then thirds changing the 3 crosswise folds as needed.
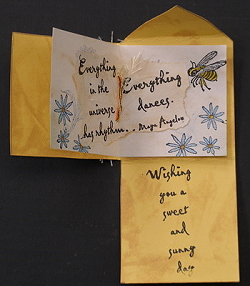
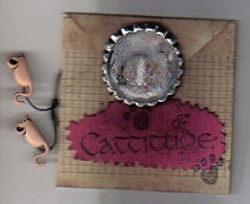
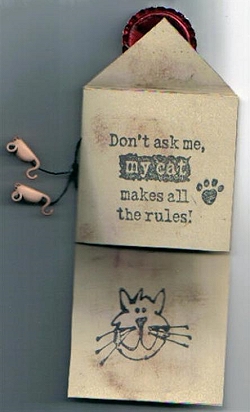
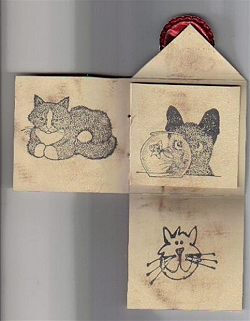
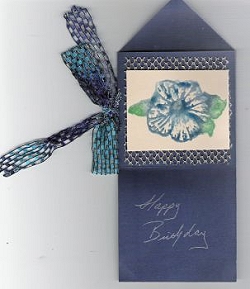
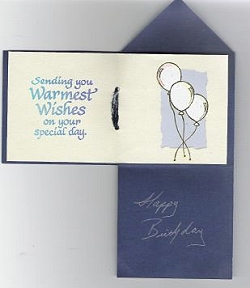
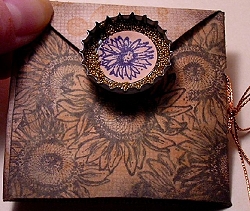
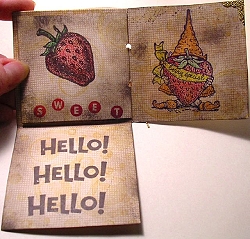
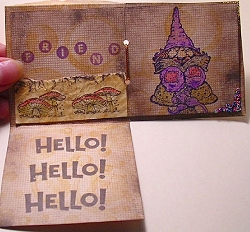
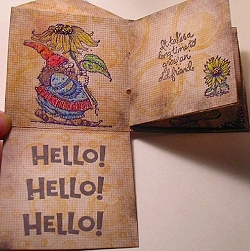
Examples
Beth
Beth
Beth
Diane Martin aka Fly Di
Diane Martin aka Fly Di

Diane Martin aka Fly Di
Dona Deam
Dona Deam
Dona Deam
Dona Deam
Jean Marchand
Jean Marchand
Jean Marchand
Jean Marchand
Jean Marchand
Kathi Hall
Kathi Hall
Pam Fuda
Pam Fuda
Sheila
Sheila
Sheila
Sheila