Beaded Window Cards

By Suzanne Glazier
Supply List:
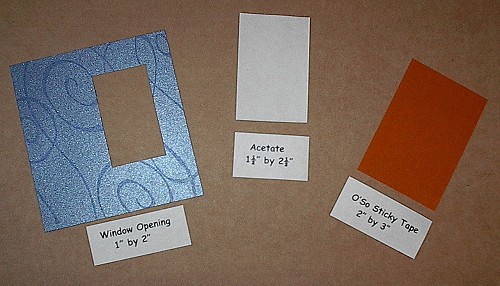
- A piece of clear acetate for your window
- O'So Sticky Tape Sheet
- One Scrap Red Liner - from a used sheet of O'So Sticky Tape
- Clear Mini Micro Beads (You can use the regular clear micro beads if you wish!)
- Stamps, Inks and Coloring tools of choice. Keep in mind what image you want to have showing through the window of your card
- Temporary Adhesive - this can be a temporary scotch tape, mono adhesive, or whatever you have on hand that will allow you to reposition something!
- Tools to Cut out a Window. You can use a ruler with an exacto knife, or if you have any hand held punches that will do the trick - you can use those! For my example, I used my square "Whale of a punch"!
- One piece of cardstock for the card base - can be any size card you like! The example is done with a white cardstock base that is 8.5" by 4.5" Folded in half it makes a nice size for this card! (4.25" x 4.5")
- One piece of cardstock for the cover of your card. This can be the same color as your base, or you many want to choose something that coordinates, or even contrasts nicely. I chose to use Stardream paper in the Sapphire Blue color. You'll want this piece to be at most, the same size as your card front. I chose to trim mine down to 4 1/4" by 4 3/4", so that the white base piece would frame the blue cover piece.
- Fibers or ribbon to coordinate with and complete your creation

Directions:
Step 1:
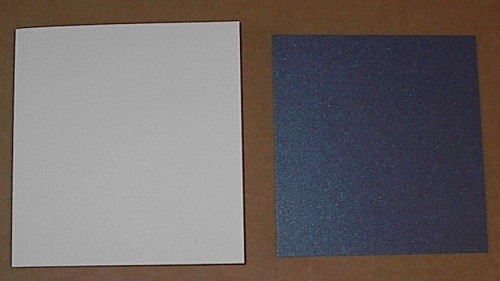
Choose a piece of cardstock for your card base.
The example is done with a white cardstock base that is 8.5" by 4.5"
Folded in half it makes a nice size for this card! (4.25" x 4.5")
Choose a piece of cardstock for your card base.
The example is done with a white cardstock base that is 8.5" by 4.5"
Folded in half it makes a nice size for this card! (4.25" x 4.5")
Step 2:
Create another layer for the cover of your card.
This can be the same color as your base, or you many want to choose something that coordinates, or even contrasts nicely. I chose to use Stardream paper in the Sapphire Blue color.
You'll want this piece to be at most, the same size as your card front. I chose to trim mine down to 4 1/4" by 4 3/4", so that the white base piece would frame the blue cover piece.
Step 3:
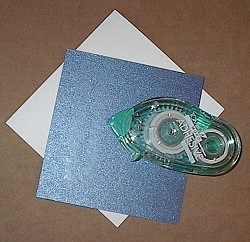
Fasten the cover piece to the card front with a temporary adhesive.
You NEED to be able to remove and reposition this piece later!
Fasten the cover piece to the card front with a temporary adhesive.
You NEED to be able to remove and reposition this piece later!

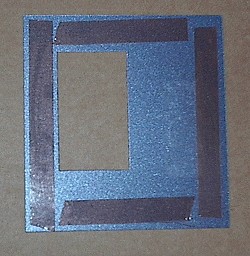
Step 4:
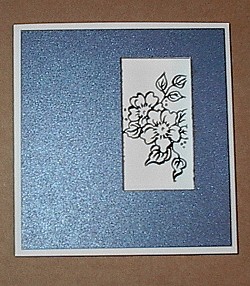
Use a craft knife or large craft punch to make a window through both front layers of your card.
Use a craft knife or large craft punch to make a window through both front layers of your card.
Step 5:
This is a good time to stamp the image inside your card so that it shows through the window.
This is a good time to stamp the image inside your card so that it shows through the window.

Step 6:
Separate the cover from the card and remove the temporary adhesive and stamp the cover as desired.
Separate the cover from the card and remove the temporary adhesive and stamp the cover as desired.
Step 7:
Cut a piece of acetate for your window. Make it a little bigger than the opening. It should be large enough to fit in your window with about ¼" overlap on each side.
Also cut a piece of O'So Sticky from a tape sheet. The O'So needs to overlap your acetate about ¼" on each side.
(For example, if your window is a 1 1/2" square, then your acetate needs to be 2" square and your O'So Sticky Tape needs to be 2 1/2" square.)
Step 8:
In this step, I will show you how you can use tape liners to your advantage and save yourself a lot of headaches and wasted tape! Marjie taught me this little trick last year, and it has made a huge difference in the way I manipulate tape for my projects!
Take your piece of O'So Sticky tape and peel back ONE of the liners, just a little and fold it down.
Step 9:
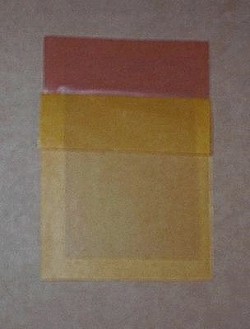
Hold onto the tape with the exposed adhesive facing you and lay the acetate down onto the tape liner. The liner will give the acetate just enough lift to keep it from actually touching the tape. This allows you the opportunity to get the acetate just exactly where you want it! In this case, that is right smack in the middle.
Once you have your acetate in place, press it down onto the exposed tape.
Now it is anchored - and you can peel the rest of that liner off, and press it onto the O'So Sticky adhesive. DO NOT remove the 2nd liner yet!
Step 10:
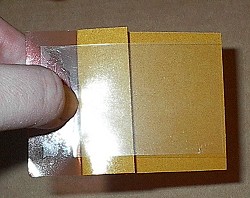
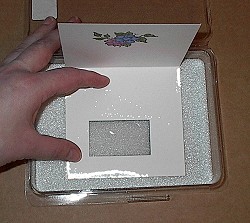
I said it once, and I'll say it again…… DO NOT remove the 2nd liner yet!
Take this piece and place it over the window of your card base acetate side DOWN.
The exposed O'So Sticky edges will hold the acetate into the card.
I said it once, and I'll say it again…… DO NOT remove the 2nd liner yet!
Take this piece and place it over the window of your card base acetate side DOWN.
The exposed O'So Sticky edges will hold the acetate into the card.
Step 11:
Next, place strips of O'So Sticky Tape on the back side of your cover piece.
Remove the liners from them as well as from the top of your acetate piece. Take care and try not to touch the adhesive with your fingers at all.
Next, place strips of O'So Sticky Tape on the back side of your cover piece.
Remove the liners from them as well as from the top of your acetate piece. Take care and try not to touch the adhesive with your fingers at all.
Step 12:
Get out your Scrap Red Liner from a used sheet of O'So Sticky Tape. If you are new to the group or haven't heard me say this before……… SAVE YOUR LINERS!! These will come in quite handy as you will see!!
Place the red liner over the exposed adhesive of your card base, (remember you base is the piece with the acetate window now Attached.) Leave just a bit of the base exposed at the top.
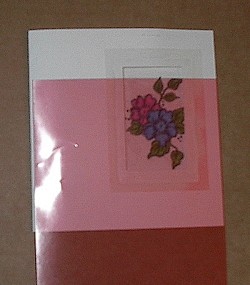
Step 13:
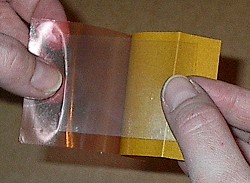
Again we are using the O'So Sticky RED liner to assist us in getting something positioned exactly where we want it to be before it gets stuck!
Once you get used to doing this you'll wonder how you ever managed without the trick!
Now, place the cover piece over the front of your card base taking care to line up the window openings of both pieces.
When the cover is right where you want it to be, press down on the top edge so the exposed adhesive will grab the card base and your cover will be in place.
Now, carefully peel the red liner out from behind the cover and press the cover onto the base to secure.
IMPORTANT NOTE:
There is adhesive being exposed through the window now - so try not to touch it!!
There is adhesive being exposed through the window now - so try not to touch it!!
Step 14:
Place the clear beads into a flat dish or craft tray.
Lay the card face down into the tray and press firmly to coat the window with beads.
Lift card, and repeat until the exposed tape is covered.
Place the clear beads into a flat dish or craft tray.
Lay the card face down into the tray and press firmly to coat the window with beads.
Lift card, and repeat until the exposed tape is covered.
Step 15:
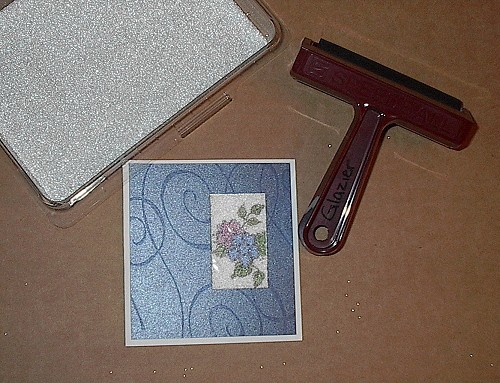
Use an old hard rubber brayer to press the beads firmly into the O'So Sticky Tape.
If the room is cool, you can gently warm the tape with your embossing tool to make the tape softer, then brayer the beads firmly down into the tape.
Use an old hard rubber brayer to press the beads firmly into the O'So Sticky Tape.
If the room is cool, you can gently warm the tape with your embossing tool to make the tape softer, then brayer the beads firmly down into the tape.
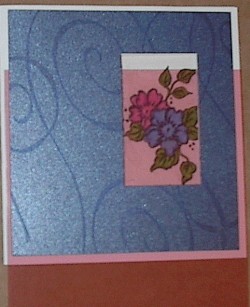
Step 16:
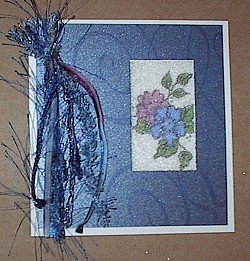
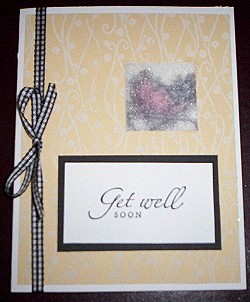
Finish and embellish your card as desired!
Finish and embellish your card as desired!
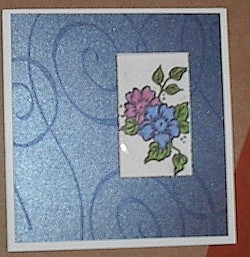
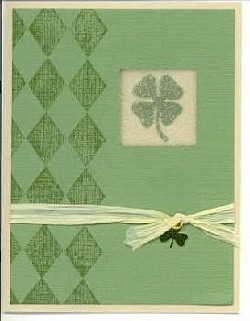
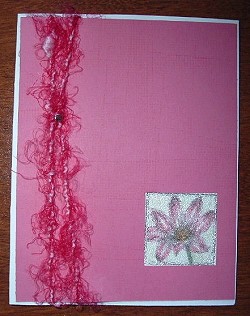
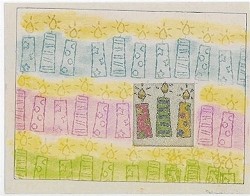
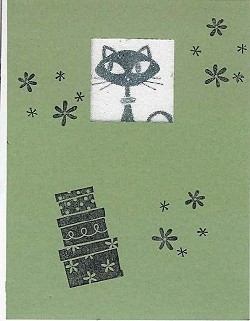
Examples
Jean Marchand

Lisa Heusler
MC
Camela Gertner
Diane Raschal aka Inki Di
Kathy McDowell