Beaded Explosion Card Box

By Julie Poe
Supply List:
- Stamps and Ink
- O'So Sticky Tape
- PWA Clear Micro Beads
- Ribbon - 26" or so
- Ruler and Scoring implement (bone folder or stylus)
- Adhesive - mono, glue dots, O'So
- Scissors
- 2 Sheets of Cardstock
- Smaller pieces of cardstock for layering
- You will cut a piece of cardstock 7 1/2 x 7 1/2" square. This piece will be scored at 2 1/2" intervals in both directions. It should look like a tic-tac-toe grid.
- The second piece of cardstock is cut 4 3/8 x 4 3/8" square. Score 7/8" in from each side.
- The layering pieces for the top of the lid... one for stamping the image and another (no bigger than 2 1/4" sq.) to layer under the image piece.

Notes:
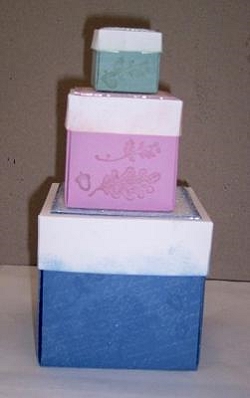
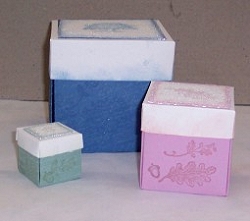
Here are the dimensions, etc. I used for my trio of Explosion Card Boxes. Hope this helps you out to try other dimensions as well.
Large Box 4" - 12" square cardstock, scored in at 4 inch all around. Lid - 7 inch sq. cardstock, scored in at 1 1/2 inch all around.
Medium Box 2 3/4" - 8 1/4" square cardstock, scored in at 2 3/4" all around. Lid - 4 3/4" square cardstock, scored in at 1" all around.
Small Box 1 1/2" - 4 1/2" square cardstock, scored in at 1 1/2" all around. Lid - 2 1/2" square cardstock, scored in at 1/2" all around.
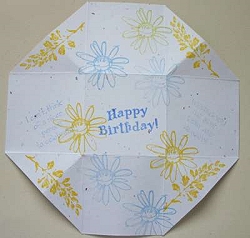
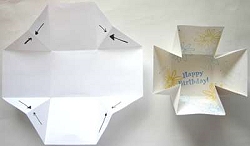
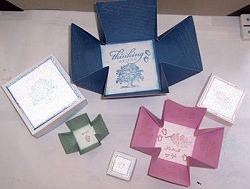
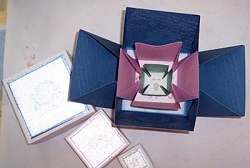
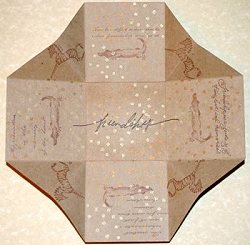
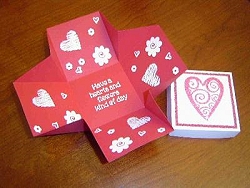
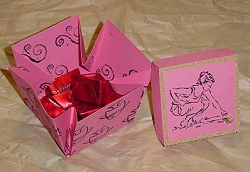
This box is a 2 piece construction. When you lift the lid - the bottom falls open into a card. You can also hide little surprises inside - like chocolates, golf ball, money, jewelry... If you attach a button on the top of the lid, you can suspend fish line from the underside and attach cut outs or sayings to the line so they will display as the lid is lifted. This is what the box looks like in the open position.
Here are the dimensions, etc. I used for my trio of Explosion Card Boxes. Hope this helps you out to try other dimensions as well.
Large Box 4" - 12" square cardstock, scored in at 4 inch all around. Lid - 7 inch sq. cardstock, scored in at 1 1/2 inch all around.
Medium Box 2 3/4" - 8 1/4" square cardstock, scored in at 2 3/4" all around. Lid - 4 3/4" square cardstock, scored in at 1" all around.
Small Box 1 1/2" - 4 1/2" square cardstock, scored in at 1 1/2" all around. Lid - 2 1/2" square cardstock, scored in at 1/2" all around.
This box is a 2 piece construction. When you lift the lid - the bottom falls open into a card. You can also hide little surprises inside - like chocolates, golf ball, money, jewelry... If you attach a button on the top of the lid, you can suspend fish line from the underside and attach cut outs or sayings to the line so they will display as the lid is lifted. This is what the box looks like in the open position.
Directions:
Step 1:
Gather, cut, score
Gather your supplies. You will need to score the 7 1/2" square at 2 1/2" intervals in both directions so it will look like a tic-tac-toe grid. You will also need to score the 4 3/8" square at 7/8" in from each side.
Gather, cut, score
Gather your supplies. You will need to score the 7 1/2" square at 2 1/2" intervals in both directions so it will look like a tic-tac-toe grid. You will also need to score the 4 3/8" square at 7/8" in from each side.
Step 2:
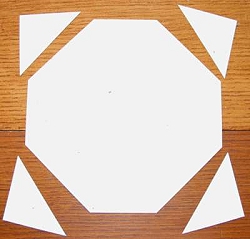
Cutting corners
Now we will work with the scored 7 1/2" piece. Cut off the corners to - score line to score line. It will end up looking like a stop sign.
Cutting corners
Now we will work with the scored 7 1/2" piece. Cut off the corners to - score line to score line. It will end up looking like a stop sign.
Step 3:
Stamp it up
Choose your coordinated stamp images/ink to stamp the inside of the box, the outside, and the central image on a small piece of cardstock to layer on the lid. You can also stamp the edges of the lid if you like. Inside you might put a greeting in the center square and stamp or journal or add pics to the rest of the areas, decorating as you choose.
Outside - keep in mind where the bottom edge of the box is and what will be covered by the lid.
Step 4:
Form the box
To form the box - while looking at the inside (stamped 7 1/2" sq.) - fold along each of the score lines. Now... One at a time - push the cut corners inward and lightly pinch the folds. Set aside.
Form the box
To form the box - while looking at the inside (stamped 7 1/2" sq.) - fold along each of the score lines. Now... One at a time - push the cut corners inward and lightly pinch the folds. Set aside.
Step 5:
The lid
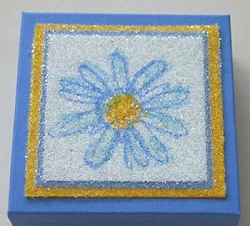
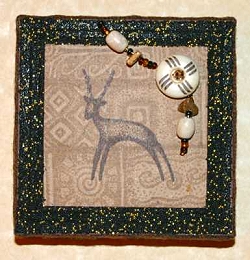
Take the small image you stamped earlier and layer to a coordinating piece of cardstock. The image plus the layering should not measure more than 2 1/4" square. Cut a piece of O'So sticky sheet the same size as your layered piece. Peel off one liner and cover the layered piece. Rub down to burnish well. Remove the top liner and dip into PWA clear micro beads. Smoosh the beads in well a few times to get complete coverage. Use an old brayer over a piece of scratch paper to seat the beads well into the O'So tape. Attach the beaded piece to the center top of the score lid piece of cardstock.
The lid
Take the small image you stamped earlier and layer to a coordinating piece of cardstock. The image plus the layering should not measure more than 2 1/4" square. Cut a piece of O'So sticky sheet the same size as your layered piece. Peel off one liner and cover the layered piece. Rub down to burnish well. Remove the top liner and dip into PWA clear micro beads. Smoosh the beads in well a few times to get complete coverage. Use an old brayer over a piece of scratch paper to seat the beads well into the O'So tape. Attach the beaded piece to the center top of the score lid piece of cardstock.
Step 6:
Fold the lid
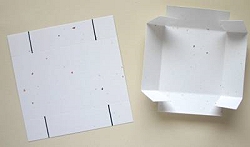
Make a total of 4 cuts 7/8" each on the score lines of 2 opposite sides only.
Fold on all score lines. Put O'So tape on the 4 little tabs and attach inside of the adjoining sides to form the box lid.
Fold the lid
Make a total of 4 cuts 7/8" each on the score lines of 2 opposite sides only.
Fold on all score lines. Put O'So tape on the 4 little tabs and attach inside of the adjoining sides to form the box lid.
Step 7:
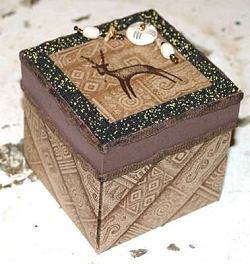
The big finish
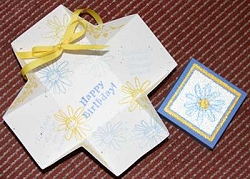
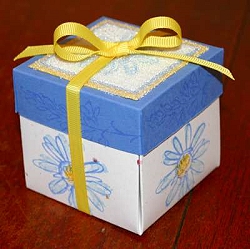
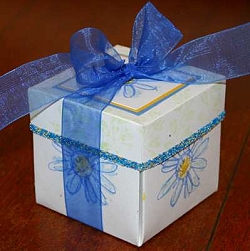
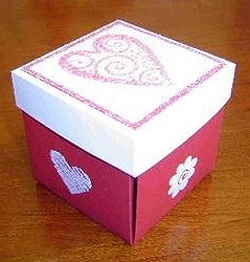
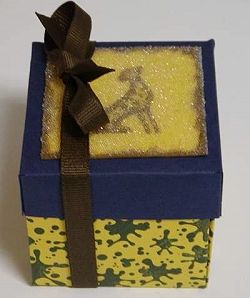
Put the lid on the folded box bottom. Tie on a ribbon or cord with a bow on top.
You have created an O'So pretty card and presentation box - all in one.
The big finish
Put the lid on the folded box bottom. Tie on a ribbon or cord with a bow on top.
You have created an O'So pretty card and presentation box - all in one.
Examples
Julie Poe
Julie Poe
Julie Poe
Kathy Hill
Kathy Hill
Kathy Hill

Kathy Hill
Kathy Hill
Mary Jane Dyer
Mary Jane Dyer
Katie De Buse
Katrina Merryman