3D Star

By Suzanne Glazier
Supply List:
- 2, 4, or 8 pieces (depending on star size) of plain white cardstock
[Large 3D Star Template]: Print 8 Pages
[Medium 3D Star Template]: Print 4 Pages
[Small 3D Star Template]: Print 2 Pages - 1 parent sheet of handmade paper
- Scissors
- Scoring Tool and Ruler/Straight Edge
- Bone Folder
- Spray Glue Adhesive
- Sure Tac or other thick, clear drying craft glue
- Skewer or long paintbrush - (using handle to reach narrow points)
- 1/8" Hole Punch
- Coordinating Ribbon - about 28" for a nice long hanger
- Coordinating Cardstock
- Large and Medium Circle punches
- O'So Sticky Paperback Tape
- Micro Beads - any size - I used Ultra Fine
- "Wish" Stamp from Rubber Stampede
- Brillance Ink - Galaxy Gold
By Suzanne Glazier

Directions:
Note:
Brian did the templates in 3 sizes for us -- the smallest one comes out to be about 9" across and the largest one is 18" across -- I haven't made the middle sized one yet - but it's safe to say that it will be somewhere between those two sizes! :-)
These are so easy to do! The large one takes about 2 hours, the smaller ones go much faster.
I will provide the instructions for the BIG star - which you can also use to create smaller ones if you desire.
Step 1:
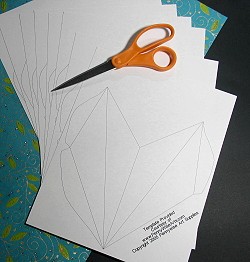
Print the "large" star template out 8 times on plain cardstock. Rough cut around the edges to get rid off the excess unnecessary paper.
Note: You can also print these pdf files directly onto the back of patterned paper!
Print the "large" star template out 8 times on plain cardstock. Rough cut around the edges to get rid off the excess unnecessary paper.
Note: You can also print these pdf files directly onto the back of patterned paper!
Step 2:
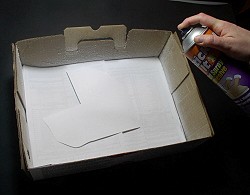
Use a spray glue adhesive to place this onto a parent sheet of handmade paper - the plain side of the template against the BACK of the handmade paper sheet - so that you can see the template lines! Be sure that the edges are adhered well!
Note: One full sheet of handmade paper will do one large star with some scraps left over for other projects. I used the Swirl Leaf Teal paper for my star example.
Step 3:
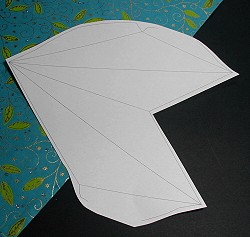
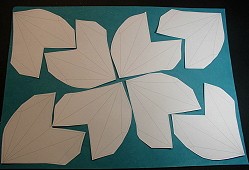
Now do the finish cut around the outside of your 8 star points.
Now do the finish cut around the outside of your 8 star points.
Step 4:
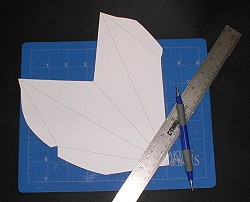
Score on the lines that pass through the middle of the template. (Those should have been dotted lines for scoring, but I didn't catch Brian's error until he was done and I didn't have the heart to ask him to redo them all!)
Score on the lines that pass through the middle of the template. (Those should have been dotted lines for scoring, but I didn't catch Brian's error until he was done and I didn't have the heart to ask him to redo them all!)
Step 5:
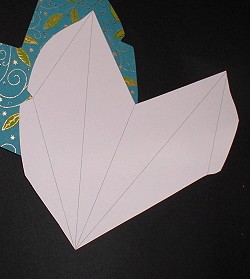
All of the folds are "valley" folds except for the two short ones that make up the tabs on one end. Those two need to be "mountain" folds You want to make your folds sharp, crisp and precise - especially at those tiny points! A bone folder is very helpful with this!
All of the folds are "valley" folds except for the two short ones that make up the tabs on one end. Those two need to be "mountain" folds You want to make your folds sharp, crisp and precise - especially at those tiny points! A bone folder is very helpful with this!
Step 6:
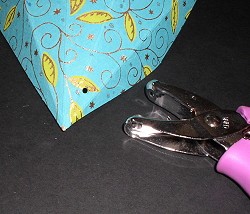
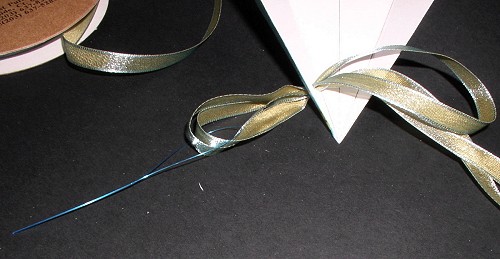
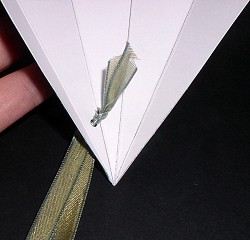
If you wish to be able to hang your star, now is the time to PUNCH THE HOLE for the ribbon and add the ribbon BEFORE you glue one of the cones shut! It'll make it easier that way!! :0) I usually do a long strip of ribbon through, leaving the two ends inside to knot - the knot holds it in place. Don't punch your hole too close to the tip - it's stronger if you are about 1/4 or more away from the point!
If you wish to be able to hang your star, now is the time to PUNCH THE HOLE for the ribbon and add the ribbon BEFORE you glue one of the cones shut! It'll make it easier that way!! :0) I usually do a long strip of ribbon through, leaving the two ends inside to knot - the knot holds it in place. Don't punch your hole too close to the tip - it's stronger if you are about 1/4 or more away from the point!
Step 7:
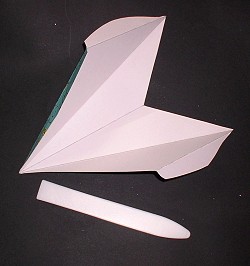
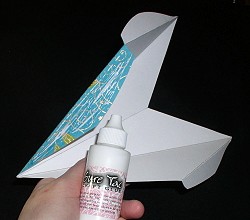
Put glue on the long tab of all 8 star points - not too much! You want it to adhere to the inside of the opposite side of your star point to create a cone shape, but you don't want glue to ooze out when you squeeze it together! Be sparing! This is all the glue you need!
My favorite all purpose, clear drying glue is Sure Tac - we have it on our website.
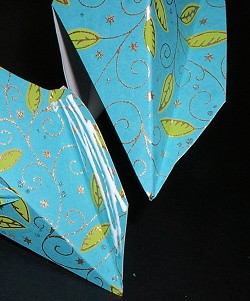
Step 8:
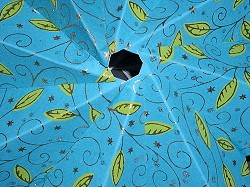
Now it's time to start nesting each of the points together - one inside of the next as shown. Be sure that you are lining up all of your edges precisely both in the front and the back!
Note: Your inside points won't line up perfectly, but will form a spiral going around the center as shown in this photo:
It's a good idea to let your star sit for a few minutes between adding points, so that the glue has a chance to set up a little. When you get to the end, if the points are still really wet, the star will be difficult to close.
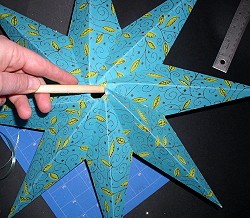
Step 9:
The 8th and final point will be the trickiest one to do because the area you have left to work in is small now. A chopstick or long handled paint brush might come in handy for pressing on those hard to reach areas.
Gently work the tabs into place to finish your star.
Try sticking out your tongue and tilting your head here - it might help! :-)
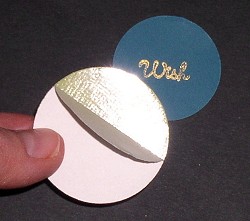
Step 10:
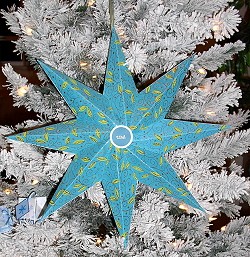
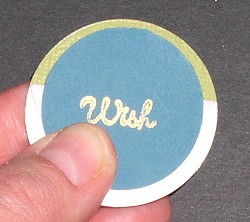
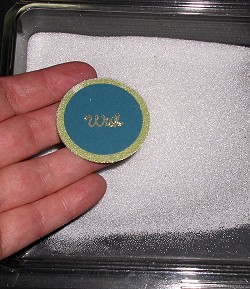
Now to embellish the center of the star to hide the hole! Big buttons or charms work well - but of course I needed to add micro beads! For mine, I punched out a large sage green cardstock circle and a large circle of O'So Sticky from paperback tape. I put the tape onto the cardstock and peeled the liner. Then I placed a smaller circle of teal cardstock in the center and pressed it into micro beads to coat the border. Finally I stamped "wish" in the middle - since that's what stars are for!
A touch of glue around the edges of the hole hold the center in place. Repeat on the back side and TA-DA! Don't poke your eye out - you've created a very substantial star decoration!!
© Suzanne Glazier of Penny Wise Art Supplies